In this article, Harshit Shah, Senior Automation Test Engineer at HSBC, outlines the best steps to share an online test automation report.
Before proceeding further, I invite you to take a look at what Netlify is and how it can help any automation tester.
Netlify is a company that provides hosting for websites whose source files are stored in the version control system like GITHUB, Bitbucket, etc, and then generates them into static web content files and served via a CDN (Content Delivery Network).
When we do automation testing, senior management always asks for the progress or status of automation. We have then to share the status report via Excel. But what if we can directly share our automation report with everyone in just one click? Netlify can help in hosting the static file free of cost. Hence, you can leverage the power of this and share your automation report via this platform, all the while solving all your issues and helping in delivering the latest reports whenever you push our code to the repository. It helps generate the report.
Here are a few tools I use for my project setup:
- Maven (3.6.0) – Maven Dependency to Download
- Selenium Java (v3.141.59)
- Cucumber (6.5.0)
- Junit (4.11)
- Webdrivermanager(5.0.2)
- extent reports-cucumber6-adapter (2.8.3)
- Maven Failsafe Plugin (3.0.0-M4)
- commons-io(2.11.0) – Adding this as we need a higher version of commons-io with cucumber adapter dependency
- Java (1.8)
- Github Account
- Eclipse/Intellij
- Netlify Account
Step 1:
- Open up an IDE of your choice and set up a Maven-free ArchType Project.
- Add all the required dependencies as mentioned above in your pom.xml with the maven failsafe plugin. You can use the Maven SureFire plugin also.
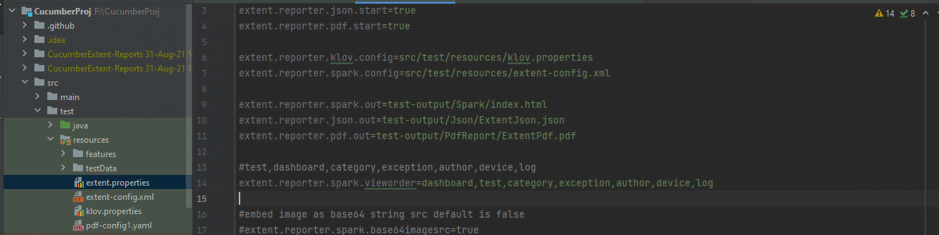
- Now setup extent.properties at your src/test/resources folder like below.
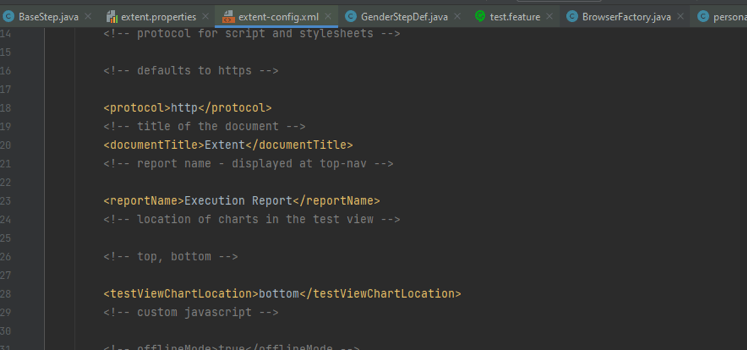
- Setup your extent-config.yml in the same folder structure.
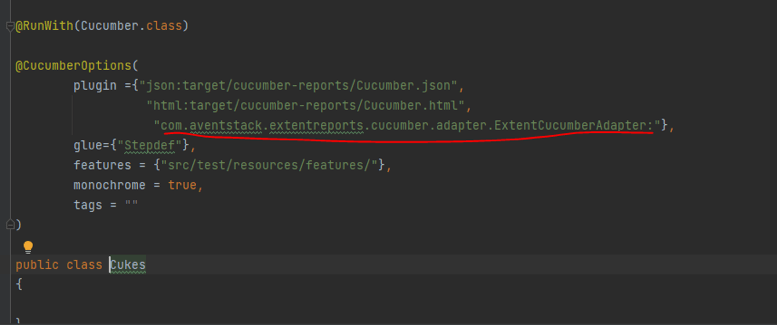
- Now, as we are doing the BDD way using Cucumber, you will need to define a runner class to run the cucumber feature. Here we are using Junit as our runner class, if someone needs Testing they can opt for the same. In the runner class, add a below line in the plugin to generate the extent report in the test-output folder for defining the properties file.
- Now, add the feature file and scenarios you want to run and their implementation.
Step 2:
Once you are done with the coding, you need to push the code to GitHub.
For that, you need to first create an account, if not already created, and create a new repository. Now, push your code to GitHub. Make sure you don’t keep a test-output folder in the .gitignore file or it will not be uploaded to Github and we won’t see the report.
Step3:
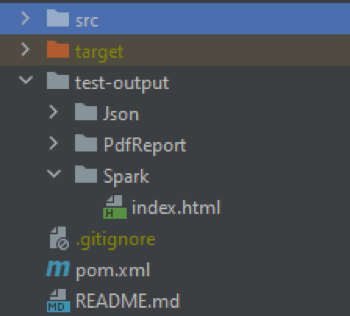
This is the crucial part. If your part 1 and part 2 have gone correctly, you will be seeing the test-output folder and in that index.html file, which will be displayed under the spark folder as shown below.
Now, you need to go to netlify.com and signup.
After that, you will find below a screen that says New site from Git as below.

Click on it and enter your Github repository URL. It will ask you to enter your Github username and password. Now, you need to select the repository you want to deploy from the dropdown.
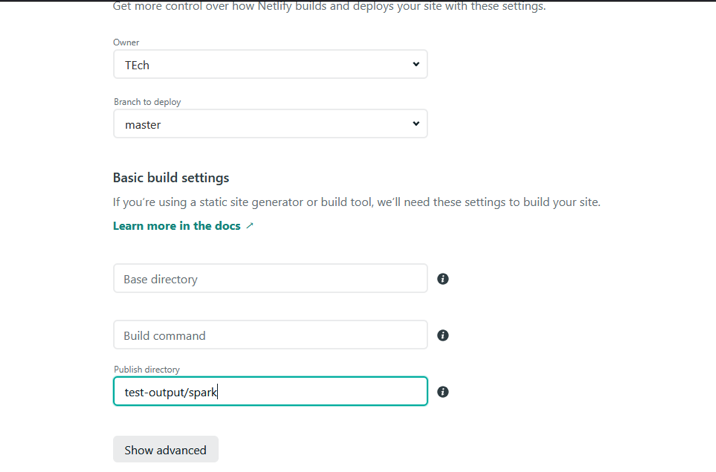
One dialog box will appear where you need to enter your details. Make sure you give the correct path of your index.html in the publish directory as shown below.
Once it is done, click on save and wait for the magic. You will see the site getting deployed and once it is, it will give the URL name where you can see the automation report.
You can view my demo automation report on https://autoreport.netlify.app/

Now, you are able to share this URL with any senior management and they will be able to see the report without having to share it over email or another medium.